Wednesday, March 28, 2012

Creme Brulee

Week 13

This week's host was Jen C. she choose Creme Brulee. Recipe on page 461 of our book.

Don't ask me why I was intimidated by this recipe, but I was. When I think of Creme Brulee it reminds me of an upscale restaurant desert which would imply a difficult derest to bake. Right? Well I has very wrong to find out how easy Creme Brulee was to make. The most difficult part was preparing enough time for it to refrigerate before serving. Other then that it turned out to be a simple, pretty, and sophisticated desert for a dinner party.

P.S. I wish I new how to put the accents above the letters in Creme Brulee.


My favorite part is the burnt raw sugar on top. I am not a huge custard person but the texture was surprisingly smooth. I was sure that with homemade Creme Brulee the texture would be off. Wrong again, I am on a roll. . .


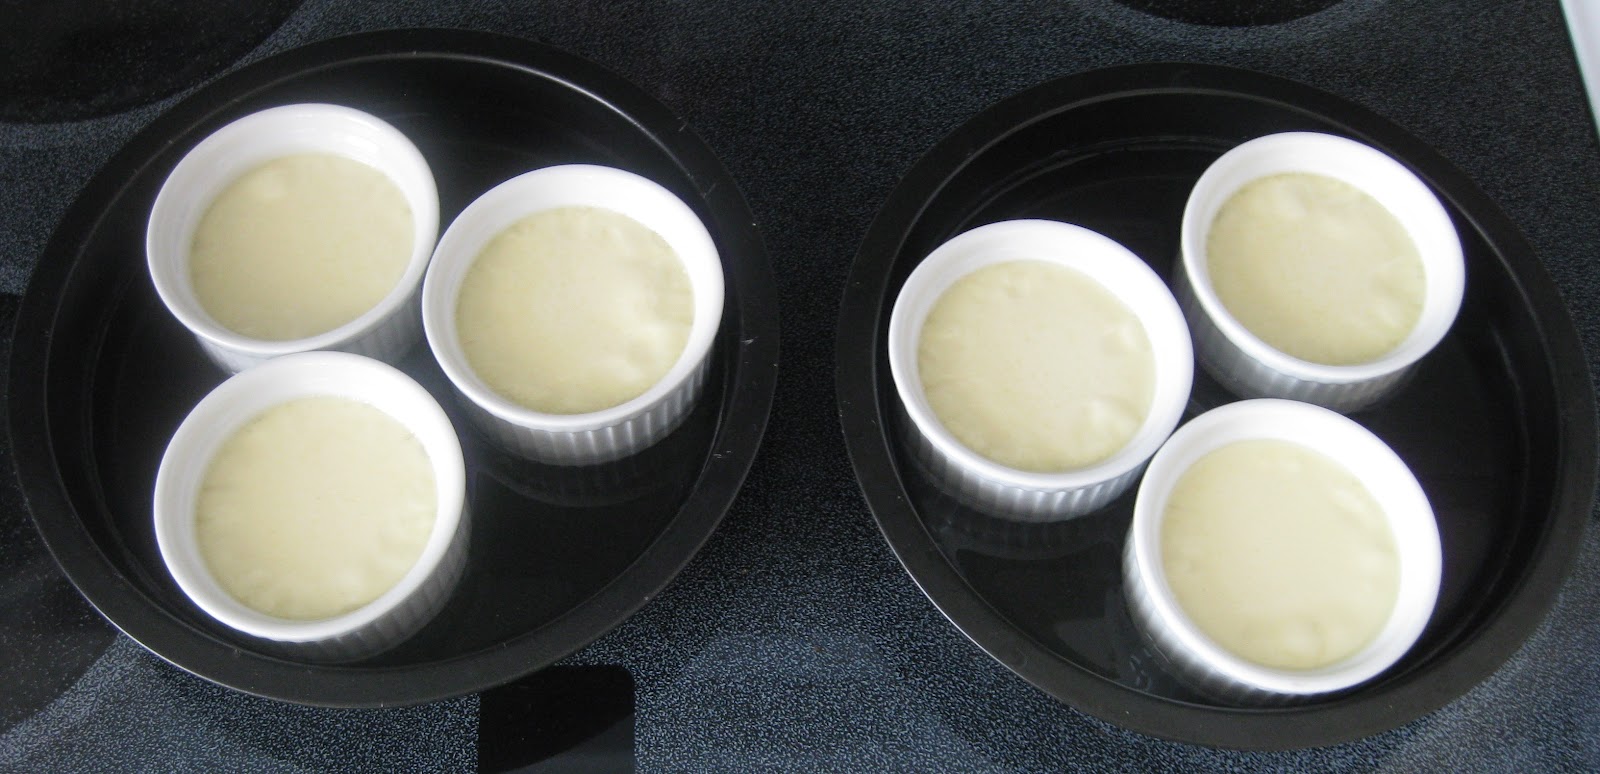
The recipe wanted us to use a roasting pan to put the ramekins in. Mine, unfortunately, is in the top of the garage and I didn't want to go get it. As you can see I used pie pans. They worked great. I decided to half the recipe knowing how rich of a desert this is. I am glad I did because I still got six 4.5 oz. ramekins full of Creme Brulee, which is great. Also, the recipe said to put a dish towel in the bottom of the pan so the ramekins don't slide around when you fill the pan with water. I was nervous about putting a dish towel in the oven so I skipped that step. It seemed to work out just fine because my ramekins fit snug into the pie pans to begin with. 

This picture is right after I pull them out of the oven. I baked them for the longer suggested time (30 minutes) to make sure we didn't have runny custard. If you look closely you can see little bubbles on top. Weird, I wondered if I baked them to long, but they went a way after it cooled.  I guess it wasn't anything to worry about.


I think they look great and my hubby loved it! It would of been nice to serve with berries on top, so I'll keep that in mind for next time.

A Tip & A Question:

  1. Half the recipe feeds six perfect servings.
  2. How does the creme not go bad when set on the counter for two hours before refrigerating?

Wednesday, March 21, 2012

Palmiers

Week 12

This week's host was Rebekah she choose Palmiers. Recipe on page 456 of our book.

I went through the whole process of baking these pastries before I realized (and read a side note in the book) that Palmiers are the same as Elephant Ears. I always see these at pastry shops. We used to sell them in the bakery at the grocery store, I worked at in high school. I have had them before. The real test was if I could make a flaky dough. One thing I noticed, since we started this baking club, is that making different textures in dough all depends on how it rises, how it's rolled, (number of times) and refrigerated. The ingredients are very similar. Thinking about this makes baking less intimidating.

"THE THINGS YOU CAN LEARN WHEN YOU TRY SOMETHING NEW"


I CAN'T BELIEVE I DID IT!

This recipe turned out great. I followed the recipe exactly and they turned out and tasted the same as I remember. This week was very satisfying. What an accomplishment to bake your first pastry and have it turn out the way it's supposed to. The texture was very enjoyable with a flaky yet moist and soft center. Really good, but I have to say that the butter content in this recipe was scary and will drive me away from making them often. 

Speaking of butter. . .


Here is the three sticks of butter involved in the making of these flaky delightful treats. I ended up rolling my butter out to big so I folded it to fit into the middle of my dough. At this point in the recipe my mouth was not watering at all. How could anything have any other flavor other then butter when more then half the recipe is butter. Well in the end it did. :)


This is how you achieve a flaky puffy pastry.  After wrapping the dough around the butter. Chill, roll out, and fold, as shown above, three times. I read in the book that by doing this it creates paper-thin sheets of butter, and when baked the moisture in the butter evaporates into steam. This causes the layers of dough to puff and separate into more then a hundred flaky delicate layers. There is some knowledge, I bet, everybody didn't know.


Okay so maybe I didn't follow the recipe exactly, I am not really sure. It said to sprinkle half a cup of sugar on the counter, which was done. Then sprinkle the other half a cup of sugar on top as needed to prevent sticking. Mine wasn't sticking at all. As you can see from my picture the first half a cup of sugar wasn't all used and the other half was not used at all. I am happy about using less sugar. The less sugar the better it is for you, right?


I think the recipe forgot to add the chocolate dip, that is a must. This is the way we sold them at the grocery store I worked at, so I had to do it.

Chocolate Recipe:
    •  8 ounces of semi-sweet chocolate
    • 2 Tablespoons of milk
    • 2-4 Tablespoons of butter (I found the more butter the smoother the chocolate.

Microwave all ingredients in 30 second increments until melted, stirring in-between.

So Good! This was my husbands favorite so far and my two year old thought they were cool because I called them "Elephant Ears". Cute! I also sent more then half of them to work with my husband because it wouldn't be good for us to eat them all. His co-workers loved them!

A Tip & A Question:
  1.  You can make different flavors of Palmiers. Cinnamon to say one.
  2. Can't think of a question right now.

Wednesday, March 14, 2012

Ciabatta Bread

Week 11

This week's host was Emily she choose Ciabatta Bread. Recipe on page 125-126 of our book.

I totally procrastinated on baking this week. No real reason. The recipe looked good and best of all it required a standing mixer which I just happened to have purchased a week ago. Guess I was just lazy. When I finally got to baking it was Tuesday. The recipe said you needed two days to bake this bread. After reading through the recipe I decided to do it in one day. There was a shorty version but I decided to use the full one. Below is the result of my first loaf, finished at 11:00pm.


Yes, I know, it looks awful! The only thing I did differently from what the recipe said was I didn't use a baking stone. (Don't have one.) Should of followed my gut and keep the bread out after the first 20 minutes. Iit was already really brown. Stupid of me!


 When the bread cooled I decided to cut into it. The crust was hard as a rock! Surprisingly the middle was moist and spongy. Tasted good, but only in the middle. I guess we could pick the middle out and eat it. (LOL) Don't really know what to do with it. Breadcrumbs? 

Lesson learned from baking Ciabatta bread: If it looks done on the outside, IT'S DONE!


Good thing I decided to bake my loaf separately, since they both didn't fit on the bottom rack of the oven.  I baked the second loaf for 10 minutes. Then flipped it over and backed for 6 minutes more. As you can see it's already starting to get burnt. In this recipe it indicates that you bake for 20 minutes and then flip the loaf over and bake for about 15-20 minutes more so that both top and bottom have a nice crispy crust. I did it but really didn't see a need for it. My bottom was just as crusty as the top when I pulled out the bread the first time.


My second loaf turned out way better as you can see, good inside and out. This is more then likely a user error but the shape didn't turn out that pretty in my opinion.

I am beginning to wonder if the baking times in this book are ever exact? I am really glad we tried to bake this bread. I learned a lot about how to make breads different textures. I do hope that my talent for baking specialty breads increases because I have feeling it's not so good right now.

A Tip & A Question:
  1. Always check your bread while in the oven, if it's your first time. A recipes' baking time is never the same in every household's oven. Better to be under baked then over.
  2. What happens to bread when it rises? Why do certain breads need to raise numerous times?

Wednesday, March 7, 2012

Lunchbox Brownies

Week 10

This week's host was Liz she choose Lunchbox Brownies. Recipe on pages 205-206 of our book.

First, I just have to say that I was really excited to make these brownies this week. Number one because I love homemade brownies and second I have been searching for a good brownie recipe.


I know what your thinking. . . and yes I agree. They look so good! I choose to do a half variation of the German chocolate brownies. I made a little change to the topping. Instead of melting all butterscotch chips on top I halved them with chocolate chips. This turned out amazing because it made the brownies more flavorful and, of course, taste so much better. My favorite was the coconut on top!

You can see I used tin foil to line the pan. It was a great tip form our cooking book which resulted in less cleaning and easy removal of the brownies. I only had one problem and don't know if this was related to the tin foil or not. My brownies were still very doughy in the middle after 27 minutes of baking. (This is the longest recommended time for baking the brownies.) The recipe also said to bake until a toothpick comes out with only a few crumbs attached. I was so nervous that they were going to be over done but continued to bake them for about 10 to 15 more minutes, in five minute intervals, until done. For some reason every time I bake brownies this happens to me. I normally end up with over baked brownies. I think it's a curse. Fortunately I was able to break it this time even though I still had to bake them longer then indicated. They turned out perfectly.


I choose to make mine with the nut option which was so good. Just a little bit of crunchiness on top of this sweet moist brownie was heavenly. Forgot to toast the walnuts though. Dan get! Next time I might try without the nuts only because my husband would prefer them with none.

Next I put the butterscotch and chocolate chips on top, waited five minutes, spread with a spatula. Now my mouth is watering. Can you tell that chocolate is my favorite treat.


Time for the last topping. Toasted cocoanut.


The toasted coconut gives them a great contrast of color along with texture. Everyone in our house enjoyed this treat a lot. I will definitely be making these again. 

P.S. I can't help but think they would be just as good with 3/4 cup sugar instead of one cup.


A Tip & A Question:

  1. Always read recipe through before baking or you'll miss the little things.
  2. Did the tin foil make my baking process take longer then indicated?